Oh hello!

I'm Meg. I make stuff.

Monday, September 16, 2013

Mandalas for kids

When I was in college, I took an incredible course from the Venerable Tenzin Yignyen in the meaning and making of Tibetan mandalas.  He taught us how to paint our own mandalas and build one together out of sand.
Our group sand mandala (based on Avalokiteshvara, the Bodhisattva of Infinite Compassion)

dismantling it 

pouring it, and our intentions, into the lake to bless all beings who use the water

It was a wonderful project.  I wanted to find a way to share the experience with my kiddos in my art class.  I focused on the ideas of symbolic imagery and the meditation of quietly drawing those things and pouring your thoughts and concentration into them.  We started by brainstorming things that we thought were important and symbols that might represent them.

lovely, aren't they?  I love kids.

Then I put on some quiet music and all of the kids made these masterpieces.  I was so proud of them!


The best part of projects like these is sitting in a circle and having the kids share their work and give each other supportive feedback.  As a childhood-enthusiast and therapist, I think it is very valuable to periodically ask kids what their values are and record them.  Not only is it an empowering and validating experience for them, it can really help ME to remember to simplify, be generous and kind, and to listen.

Art inspired by different cultures


This is another round-up of art projects from when I used to teach!  The theme for this set was "Art from Around the World."  Most of these are self-explanatory, so I'll be brief.  Here we go!

Salt dough animal totems

Build them on cardboard for easiest take-home-ability!


Mosaics made from cut up paper and contact paper
more mosaics
Aboriginal mud paintings made with tempera paint on crumpled brown paper

For paint brushes we collected our own sticks
I love the way these turned out!
Mexican paper flags
Chinese paper dragons made of paper cone cups, strips of tissue paper, and dowels.  These are so fun to "fly" and watch the streamers blow!  I have action shots but they all have faces.  You'll just have to trust me.


These are Adinkra prints are inspired by designs from Ghana.  My mom carved the stamps and graciously lent them to us!  Each of us printed one design and then shared them with everyone else, so we all made colorful, diverse banners.


More projects with more in-depth instruction coming soon!

Rainbowed-out headphones

Start with some simple headphones.  Anything will do!


Standard cheap headphones like you get at the airport when you forget to pack yours from home.

Get some Perler beads from Amazon or Michaels or something.  I used around 325 beads.  Also get an exacto knife.  Cut a slit through the side of each bead like this:

Safety first!  Wear goggles.  For added excitement, do this whole project balanced on the arm of a couch.  What was I thinking??  #couchfullofbeads


You've got to thread these onto the wire, but from the side.  Here is the good news, and what I figured out through trial and error:  you can use the plug itself as a wedge to hold the bead open while you thread it on.  Like this:

Just kind of jam it in there

Wedge the wire in that space
You did it!

Now do it 300 more times.
Just keep going forever.  I found the thinner wires that are near the upper part of the headphones where they split fit nicely with the beads, whereas the thicker part of the wire that connects to the device showed a little seam.
no seam showing
seam showing

                                       
but it didn't really bother me.  Here's the finished product, a few hours later:

I left a little space between the beads to allow for more flexibility.

                                       
A nice thing about beading your headphone wires is that they don't get tangled at all!  They do take up more space though, and attract more unicorns.

Because of the rainbows!!!  :D

Thursday, September 12, 2013

Self Portraits

There are lots of cool ways to make self portraits with kids.  Often detaching the goal of realism helps kids feel more comfortable experimenting with shapes, colors, techniques, etc.  Here are a few different ideas to try:  (A lot of these are mine instead of the kids', for privacy)

Scratch art portraits
See how to make your own scratch art paper here!

Masks using fabric scraps, pipe cleaners, beads, and paper cone cups


It is VERY important to bring in good fabric scissors or else this will be a very frustrating project for the kids- most kids art room scissors are much too dull to cut effectively.  MAKE SURE TO PUT AWAY PIPE CLEANERS BEFORE YOU BRING OUT THE GOOD SCISSORS.  One snip can ruin a good pair!

These were so fun I'm putting in a bunch.  These are simpy tempera paint on black construction paper.

I think they look so cool!!


We tried to leave black space between paint sections to keep the colors looking vibrant.  

As I've mentioned before, adding in some element of an unusual or unfamiliar art supply can really inspire kids.  Here, I had them choose one word from a magnetic poetry set that they felt described them.  Then they drew the feelings that word game them and glued on the piece.


Last but not least, one of my favorites- Andy Warhol-inspired portraits!

Oh my. 

The kids LOVED these.  Take a picture of each child making a silly face.  Then print out 4 side-by-side copies of it in black and white on plain printer paper.  Then color over them with colored pencils!

The frame here is made out of scraps of discarded art.  We did this a lot, and it helped us remember to get as many uses out of a single sheet of paper as we could!  (We also read The Lorax at the beginning of each week to help us remember to conserve and recycle resources!)


Under the sea art projects


This is a round-up of some of the projects we did in our Underwater Adventures week!

3-D Atlantis Maps
Another, with creative use of sticker salvage pieces
I find that little bits of materials like cool yarn, straws, and salt dough can really bring excitement and inspiration to a project.  My kids did really cool things with them!

What will these paper mache'd balloons become?
                         
Jellyfish hats!!!
Jellyfish hats for everyone!
In case it's not obvious, we cut the paper mache balls in half, cut eye holes, painted then, and then strung strips of fun things (crepe paper, bubble wrap, wacky yarn) around the edges as tentacles.  They were really fun to wear outside- the wind made the tentacles flutter!

Decoupage with tissue paper and watered-down glue
                         

A note about doing a lot of these projects in the summer- the moisture in clay, paper mache, and decoupage can get stuck in muggy weather and can sometimes even mold (especially if you make your own paper mache glue out of flour.)  Box fans overnight can prevent this, and make everything dry and take-home ready in a day or two!


Dinosaur tar pits

When I was working at the Ann Arbor Art Center, each week of Art Camp had a different theme.  Some of them really made me stretch my ideas, and often led us down really fun paths.  For example, dinosaur tar pits!

The idea started with making tar GAK and grew from there.  First, we made our own salt dough and made little circles of stones on pieces of cardboard we colored to look like the ground, like this:

by the end of camp I think my kids had the recipe for salt dough memorized!

Next, we made gak (recipe here) and added black paint to it to look like tar.  We put little paper cups (paint cups, though the bottom of a cut paper cup would work fine) in the middle of the circle of stones, as we were worried the stones wouldn't hold the gak in enough.  Then we added gak and as a surprise, when the kids weren't looking, we added dinosaurs to each tar pit.

Perspective shots helped :)

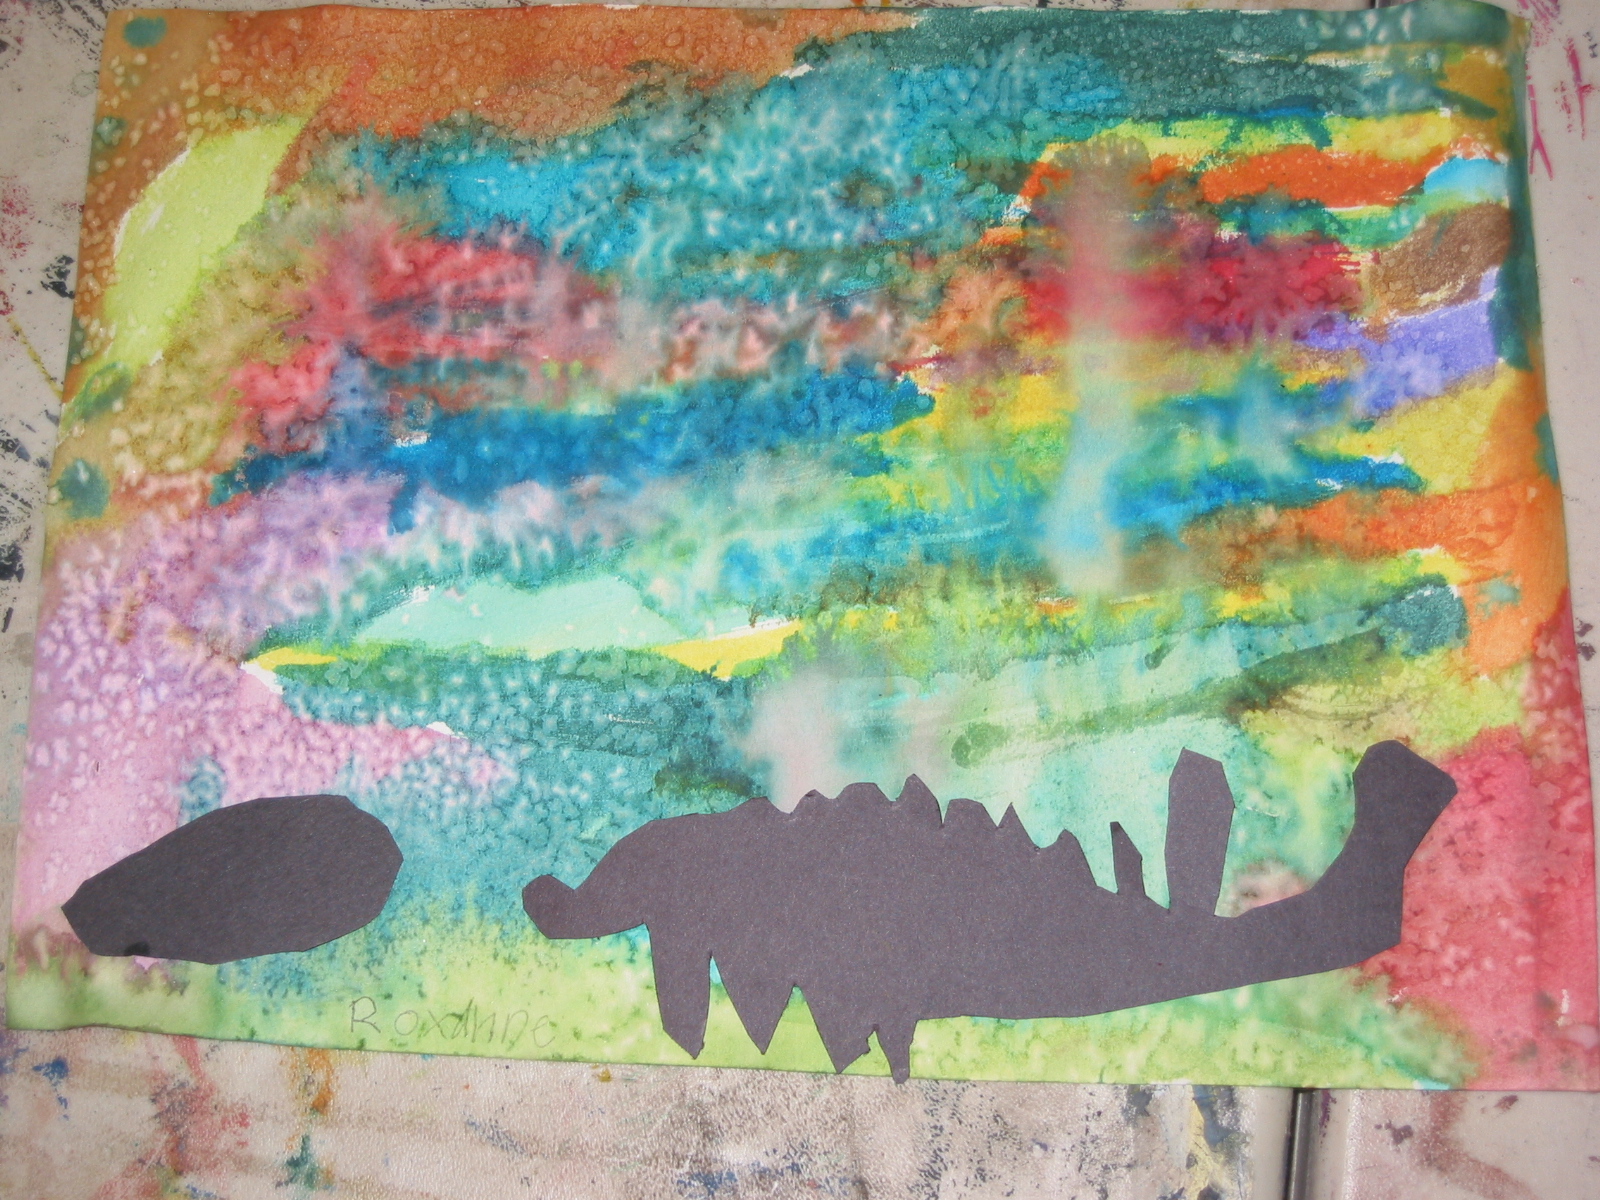
We also added little blobs of salt dough and bits of raffia to make bushes.

I love the bubbles in the tar!

After a few days, the tar dried to a nice sheen.  It stays pliable if put in a plastic baggie though.

Fun!


Salty Watercolors


This is one of my favorite art projects for just about any age kids or adults.  Different papers react to the salt differently, so try this one out before you do it with a group.

Did you know if you sprinkle salt on a still-wet watercolor it makes absolutely gorgeous crystal shapes on it?
Here are some dinosaur silhouette sunsets I did with 6-8 year olds.

We added construction paper cut-outs on top

Make sure the salt is the last step- painting over it will ruin the effect.  Different wetnesses provide different effects.  I've found it looks best when the paper is still quite damp to the touch, but not puddling.


This effect is also fun if you draw a snowman with white crayon on white paper, then paint over with blue and add salt.  It looks like snow!

The salt transformation is really fun and happens over the span of a couple of minutes.  When it's dry you may want to brush off the salt crystals with your hand, or leave them there because sometimes it makes the picture look sparkly!